anyspace
用css实现一个3d旋转菜单
2024年3月21日 • ☕️ 3 min read阅读量 : •••


前言
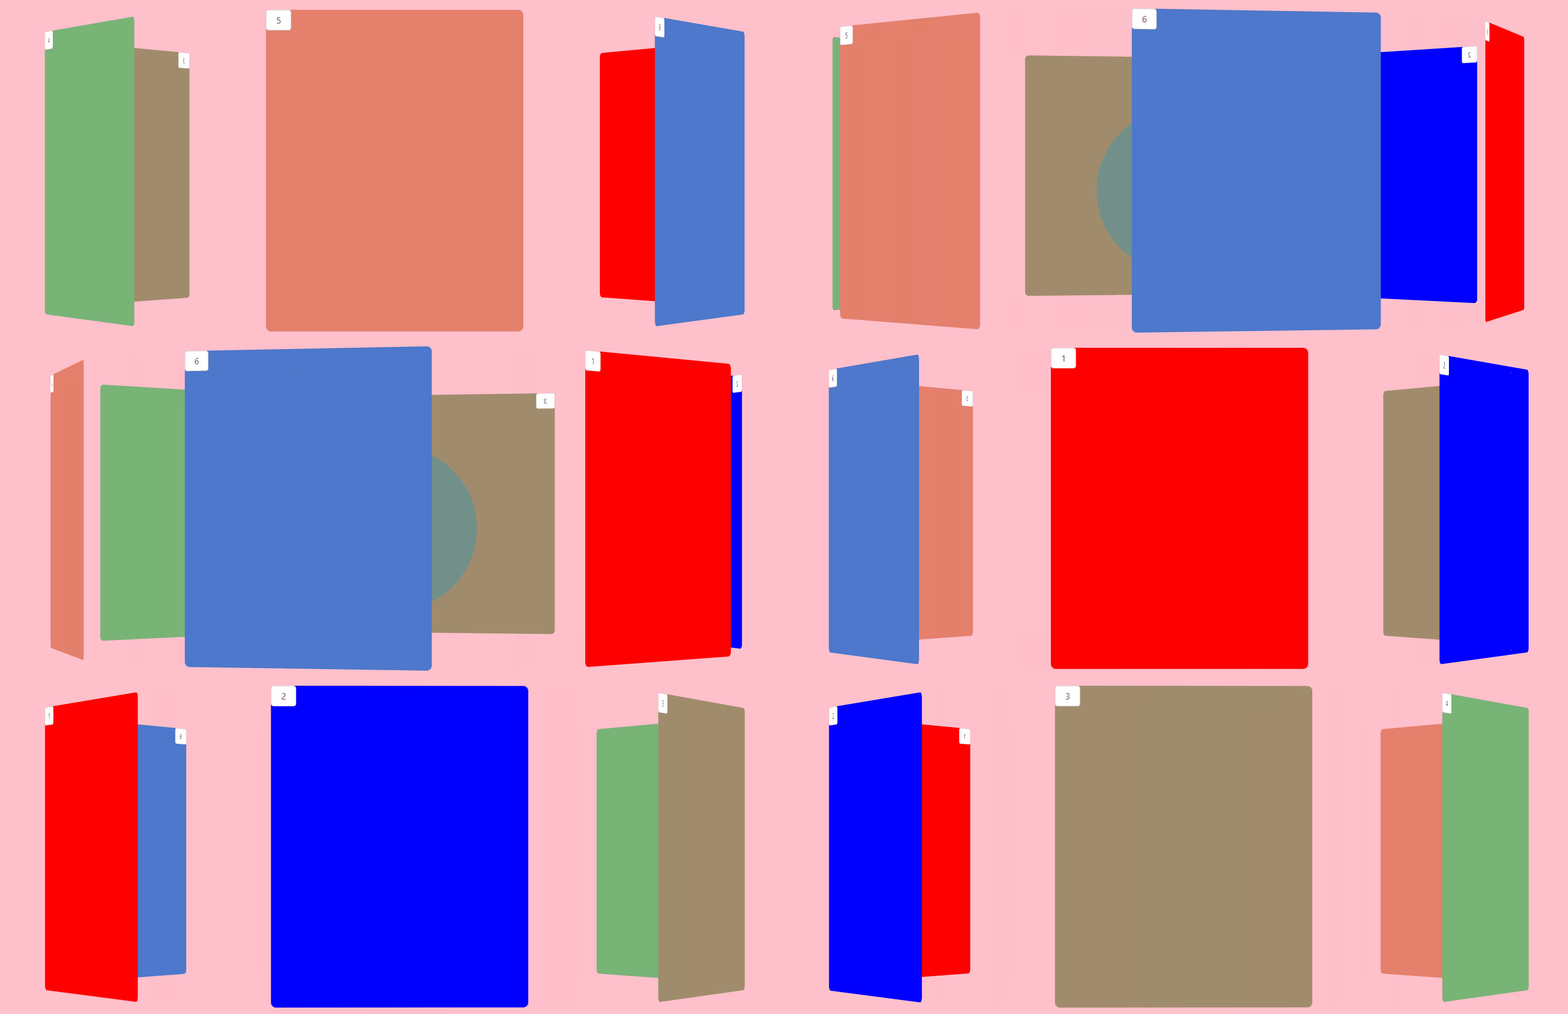
使用css实现一个3d旋转的功能:简单介绍下,有六个平面组成一个六面体,围绕中心旋转,并且可以随意点击按钮旋转到对应的平面。要有流畅的动画效果和视觉观感。
实现结果如下所示:

开始
因为平时都是2d平面布局,首先先去调研css能否将标签以3d布局,很容易得到答案是可以的。那么问题就变得有头绪有方向了。
以前做的动画效果都是平面运动,即坐标轴有x、y轴,3d无非是多了z轴而已。查阅文档后得知css是可以使用z轴的,瞬间觉得功能很简单了。😄
静态布局
话不多说,我们先把最基础的静态3d布局做出来。主要是使用transform完成。可能大部分人用到它最多的事情就是将一个元素决定定位,然后left:50%,top:50%,再使用transform:translate自身的x轴-50%,y轴-50%就完成了该元素的垂直水平居中了。那么其实我们的3d六边形布局也是一样的原理。
react代码如下:
function(){
    return (
        <Flex vertical style={{ height: '100%', width: '100%', background: 'pink', }}>
            <Flex vertical style={{ height: '100%', width: '100%'}}>
                <div className={LessStyle.wrap}>
                    <div style={{ height: '500px', width: '400px', }} id='menu0' className={LessStyle.imgwrap}>
                        <div className={LessStyle.contain} style={{ width: '100%', height: '100%', borderRadius: '8px', background: 'red', }}>
                        </div>
                    </div>
                    <div style={{ height: '500px', width: '400px', }} id='menu1' className={LessStyle.imgwrap}>
                        <div className={LessStyle.contain} style={{ width: '100%', height: '100%', borderRadius: '8px', background: 'blue', }}>
                        </div>
                    </div>
                    <div style={{ height: '500px', width: '400px', }} id='menu2' className={LessStyle.imgwrap}>
                        <div className={LessStyle.contain} style={{ width: '100%', height: '100%', borderRadius: '8px', background: '#a08c6c', }}>
                        </div>

                    </div>
                    <div style={{ height: '500px', width: '400px', }} id='menu3' className={LessStyle.imgwrap}>
                        <div className={LessStyle.contain} style={{ width: '100%', height: '100%', borderRadius: '8px', background: '#78b476', }}>
                        </div>

                    </div>
                    <div style={{ height: '500px', width: '400px', }} id='menu4' className={LessStyle.imgwrap}>
                        <div className={LessStyle.contain} style={{ width: '100%', height: '100%', borderRadius: '8px', background: '#e4806c', }}>
                        </div>

                    </div>
                    <div style={{ height: '500px', width: '400px' }} id='menu5' className={LessStyle.imgwrap}>
                        <div className={LessStyle.contain} style={{ width: '100%', height: '100%', borderRadius: '8px', background: '#4d78cc', }}>
                        </div>

                    </div>

                </div>
            </Flex>

        </Flex>
    )
}
其实就是简单的6个div,重点是下面的css代码。
.wrap {
    width: 400px;
    height: 100%;
    margin: 150px auto;
    position: relative;
    transform-style: preserve-3d;
}

.imgwrap {
    position: absolute;
    top: 0;
    left: 0;
    width: 100%;
    height: 100%;
    display: flex;
    justify-content: center;
    align-items: center;

}

.imgwrap:nth-child(1) {
    transform: rotateY(0deg) translateZ(600px);
}

.imgwrap:nth-child(2) {
    transform: rotateY(60deg) translateZ(600px);
}

.imgwrap:nth-child(3) {
    transform: rotateY(120deg) translateZ(600px);
}

.imgwrap:nth-child(4) {
    transform: rotateY(180deg) translateZ(600px);
}

.imgwrap:nth-child(5) {
    transform: rotateY(240deg) translateZ(600px);
}

.imgwrap:nth-child(6) {
    transform: rotateY(300deg) translateZ(600px);
}
核心代码:
给六个div初始位置transform: rotateY(0deg) translateZ(600px),即让其沿y轴旋转偏移0度,沿着z轴偏移600px,其他五个平面div同理。
父容器设置transform-style: preserve-3d,让子元素处于3d空间(默认为2d空间)。
动起来!
现在我们的六个平面已经被我们通过偏移旋转组成了对称六面体。现在我们需要让它沿着中心轴转动起来。首先我想到的就是css动画,毕竟以前写2d动画使用过,即使用关键帧动画。
…

一个记录知识和生活的神秘小空间
所有标签
个人简历
space